4. Creating a QuantumRisc-VM
In this section you can learn how to setup a virtual machine, how to configure the tool and project installation script and finally how to start the fully automatic QuantumRisc-VM setup process.
4.1. Prerequisites
VirtualBox (tested with version 6.1.10_Ubuntu r138449)
>6GB RAM
>85GB hard disk space (~80GB for the VM, ~5GB to archive it)
4.2. Preparing the VM
Follow the instructions on how to install Ubuntu 20.04 LTS, but instead of allocating 30GB of disk space, choose at least 85GB (100GB recommended). You can set the username and password both to “quantumrisc”. After the successful installation of Ubuntu and all tools and projects, about 76 GB are used up. During the installation of the tools and projects, the virtual hard drive image will use up to almost 80 GB temporarily. After the VM setup is complete, we will shrink the virtual hard drive image to about 21GB.
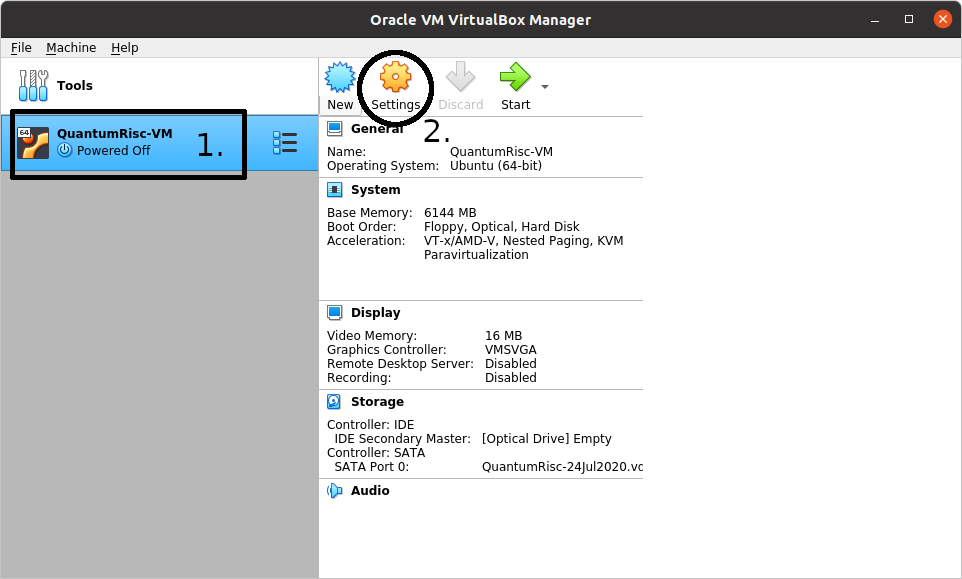
After the successful installation of Ubuntu 20.04 LTS and the VirtualBox Guest Additions on the VM, shutdown the VM and follow the instructions from section Setting up QuantumRisc-VM. In addition to those instructions, you also have to raise the available memory for the VM to at least 6GB. To achieve this, select the VM and enter the Settings dialogue:

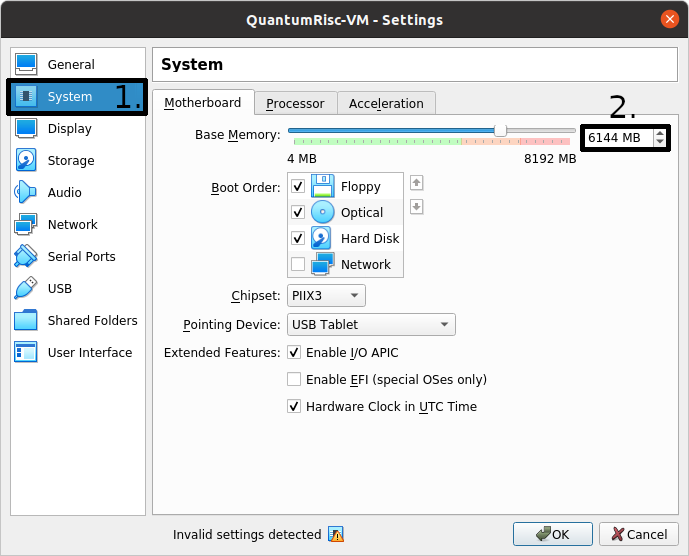
Switch to the System tab in the left menu and set the base memory to 6144 MB or more:

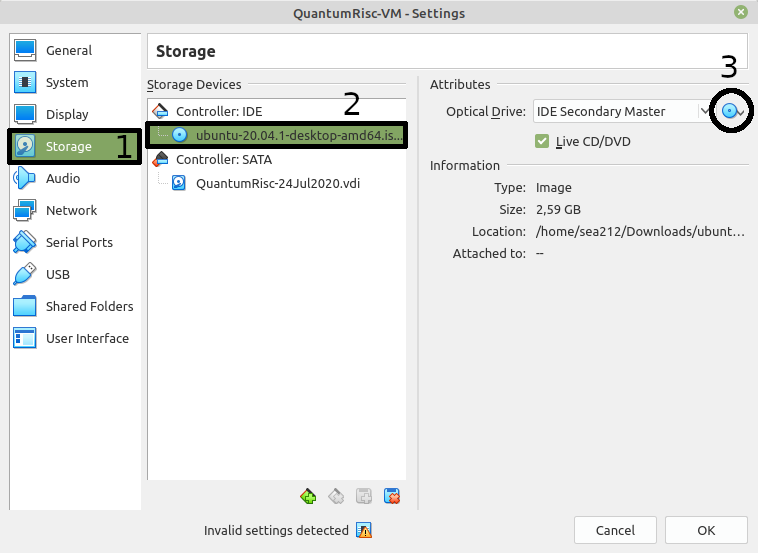
If you have not already removed the Ubuntu iso image from the virtual optical drive, the virtual machine will try to boot from it first. You can remove it in the Storage section of the Settings dialogue. Click on the image under the IDE Controller, next click on the disk image in the Attributes section and finally select “Remove Disk from Virtual Drive” in the dialogue. Since no virtual disk or floppy is detected now, the VM will boot from the virtual hard drive:

If you still experience issues booting your VM, try to change the Boot Order in the System section of the Settings dialogue. Give the Hard Disk the highest priority (top) and see if your VM boots. Note that your VM will now ignore virtual floppy or disk images during the boot process.
Start your VM and upgrade any packages on it and the kernel if desired:
sudo apt update && sudo apt upgrade -y && sudo apt dist-upgrade && sudo apt autoremove -y
4.3. Configuring and running the fully automatic install procedure
Copy the folder build_tools from the QuantumRisc-VM git project to /opt/QuantumRisc-Tools. Change the current directory to /opt/QuantumRisc-Tools/build_tools.
Configure the fully automated and configurable tools and project install script as desired. Instruction can be found on section Fully automated and configurable tools and projects install script of the scripts chapter. After an adequate configuration was created, run the install script with the desired flags (usually -c is enough), as explained in section Usage of the scripts chapter:
sudo ./install_everything.sh -c
Finally, clean up traces you left during the setup:
browser history
temporary files which are not required anymore
command line history by using the command
history -c && history -w
4.4. Shrinking the VM
Files deleted within the VM are not freed from the allocated space of the hard drive file on the host system. This has to be done manually. After the VM was configured completely, follow the tutorial at howtogeek.com to shrink the VM disk image file. You might find yourself with an error that the Linux partition is still mounted when executing zerofree as shown in the tutorial. In this case, insert the Ubuntu live CD iso image in the virtual disk like when you installed Ubuntu. After Ubuntu started from the iso image, click on “Try out” in the dialogue. Open a terminal and install zerofree: sudo apt-get install zerofree. Use the fdisk command to find the Linux partition sudo fdisk -l. Finally, use zerofree to zero unused disk space: sudo zerofree -v /dev/sd<X><Y>